In this week’s podcast, we reminisced about all the different things we’ve stitched on or with in our time.
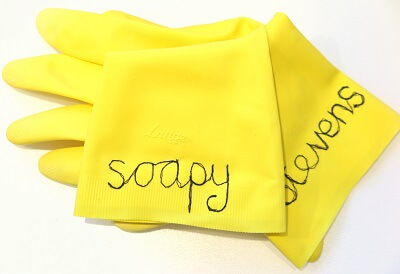
There’s definitely a few crazy things in there, such as latex imprints of cabbage leaves, rubber dishwashing gloves and balsa wood, as well as a few mixed media favourites like copper shim and plastic.
The blame can be put fairly and squarely on the years of City & Guilds courses, which were all about building a repertoire of techniques and experience, especially by the time it got to Diploma level where about 80% of the course could be classified as “experimental”. It was an excellent way to build a foundation of experience and skills and – most importantly – confidence.
But despite the eclectic array of things I’ve stitched, are there any common factors? What could I say I’ve learned from this that might actually be useful?!
It all comes down to tension, friction and precision. Master these, and you’ll go from a huge puckered mess, broken needles, snarled or broken threads and lost tempers, to successful – if a little unusual – stitching. I was able to stitch all the silly things above by learning about these three things:
Tension
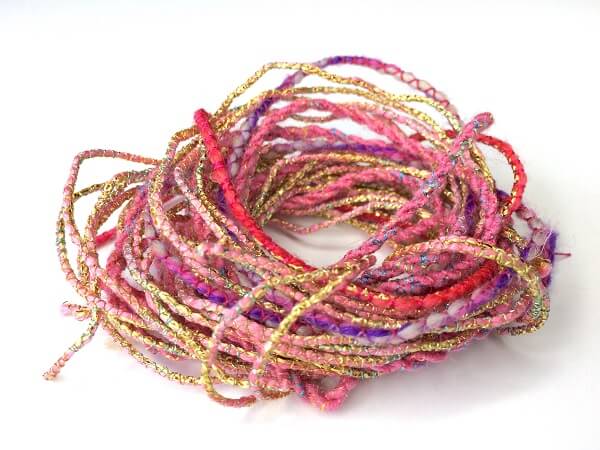
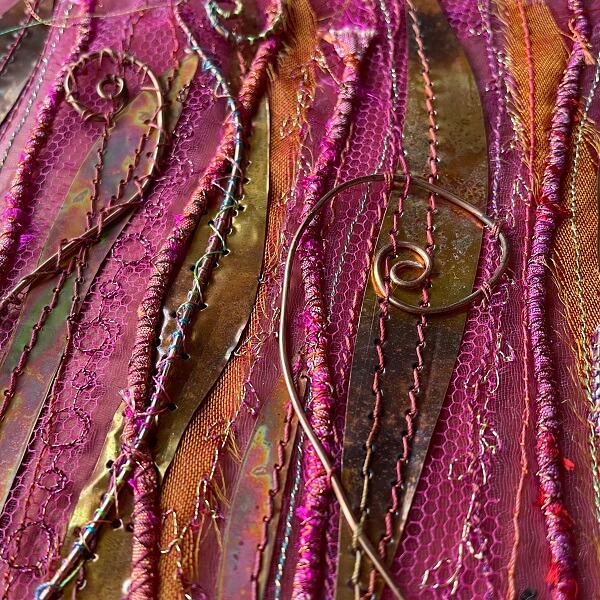
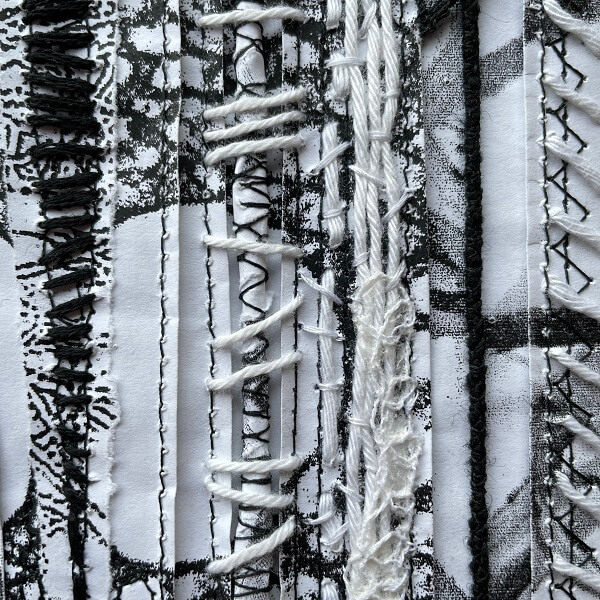
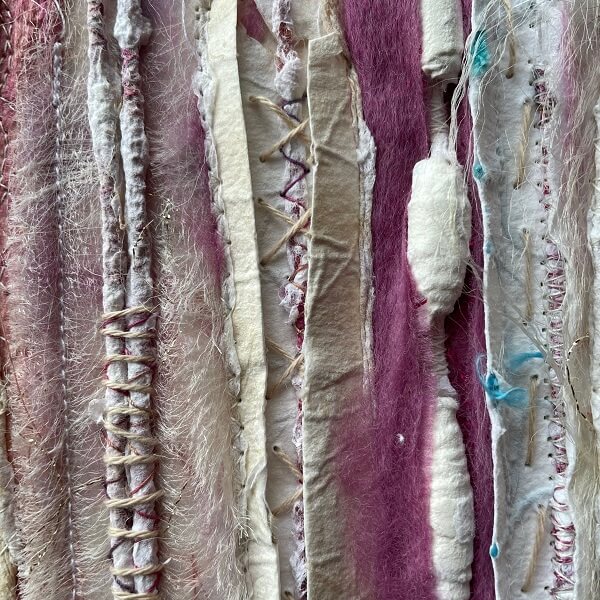
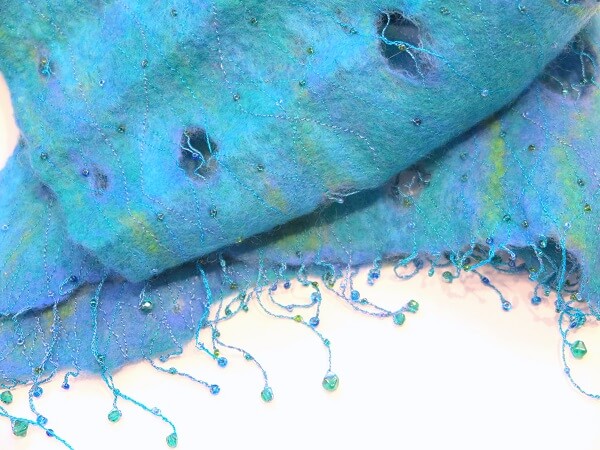
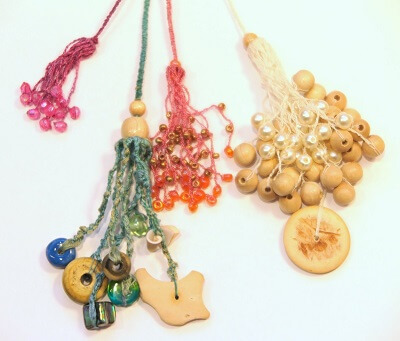
Cords, braids and wires
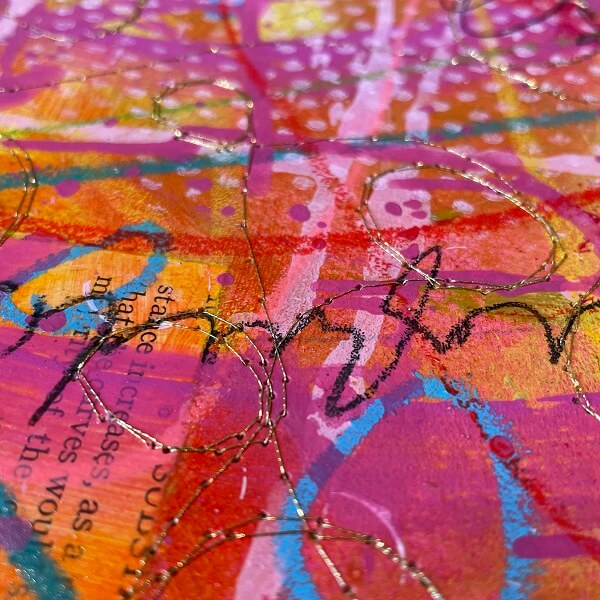
You can stitch over anything, as long as it’s held at tension, and in a straight line directly under the presser foot, not flopping about as you stitch over it. It’s usual to do this with a free motion foot, and hold the threads taut between each hand, one fore and one aft.
It could be wire, or thread, or a bundle of threads – and yes, it could also be uncooked spaghetti (you’ll have to listen to the podcast). If you want to make a cord or wrapped wire, just zigzag over it. You could use the standard presser foot, but I wouldn’t: you’ll get a squashed and flattened cord. Free motion is best, especially for wire. And spaghetti.
If you want to make a flat braid or ribbon, use the ordinary presser foot and stitch a triple zigzag or pattern down a bunch of threads. For all cords, wires and braids, as long as your bundle isn’t too thick, and your stitch can actually reach over from edge to edge, it’s all good. For stitching “hard” wires such as lampshade rings, see Precision later on!
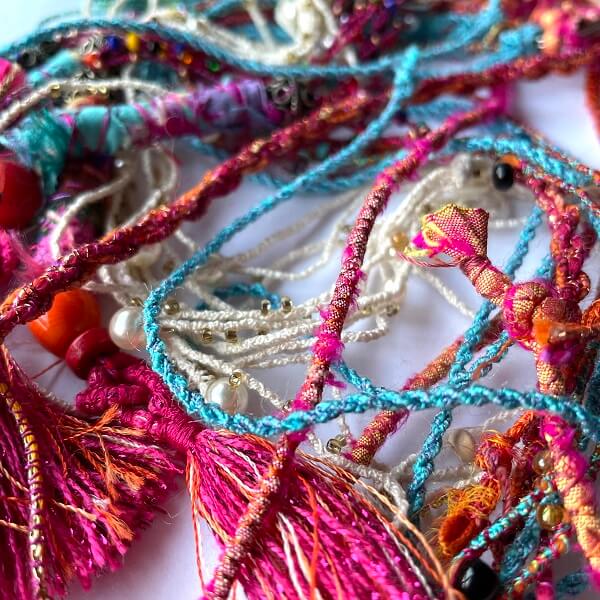
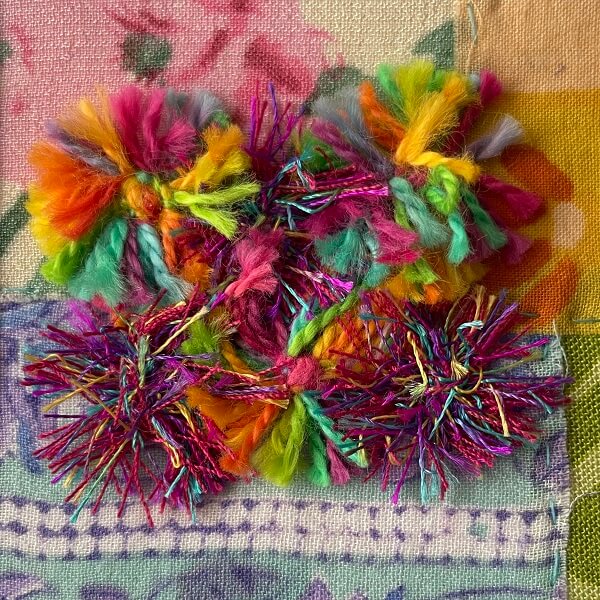
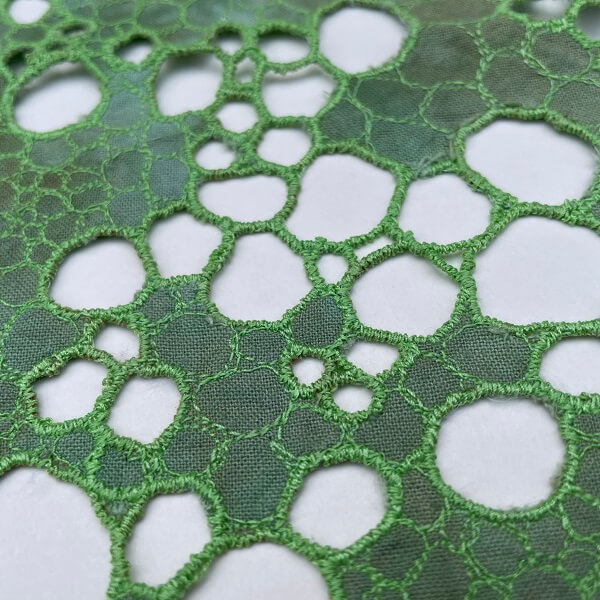
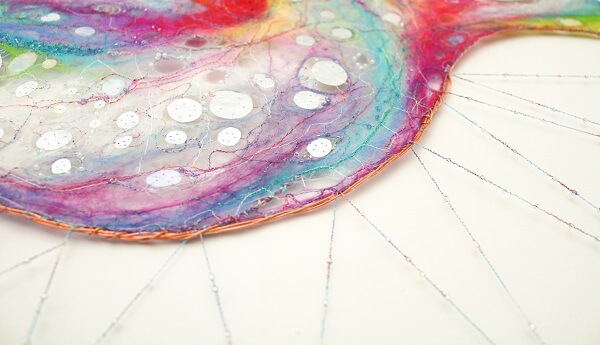
Thread daisies, gaps and holes
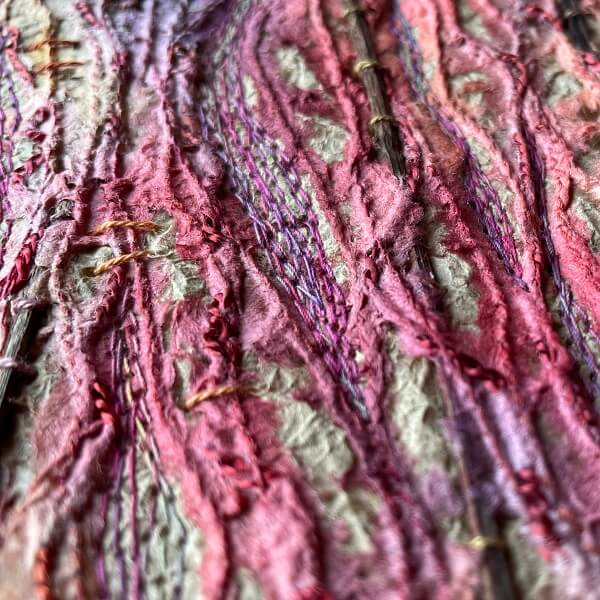
The sewing machine doesn’t know that you’re stitching over space. How could it? It’s not a sentient being, but a machine. Stretch some calico tightly into a hoop, cut a hole, then stitch over the space to the other side. As long as the calico edges are tight, when you reach the other side of the hole to anchor your stitches, the line of machine stitch will lie neatly across the space. Repeat, like the spokes of a wheel, and voilá – a thread daisy. Same with stitching over threads wrapped around a firm frame, to make a new fabric or a tassel. As long as your first stitches are anchored firmly to start, be bold and stitch across that space to another anchoring point. The machine doesn’t know.
Fabrics, paper, plastic and balsa wood
You can stitch anything as long as it’s rigid and you can get a needle through it. Paper, laminating plastic and balsa wood are all easily pierced with a needle: you just have to watch all those stitch holes so it doesn’t disintegrate as you perforate it! Longer stitches is what you need. Balsa wood can split, but it’s soft as butter to stitch through. You can also use a poker pen to burn holes in both plastic and balsa wood, as long as you’ve got excellent ventilation and preferably a respirator mask.
Copper shim (and other thin metals) are as easy to stitch as plastic, but more on metals coming up under “friction”.

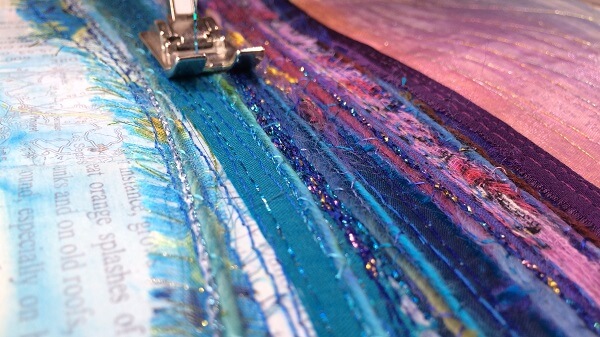
Fabric is inherently floppy. If you’re stitching with the teeth up and the normal presser foot, the fabric is held under tension between the foot and the teeth. All good. But as soon as you swap to free motion, you lose that tension so you have to reintroduce it. You can either stretch your fabric tightly in a hoop, or use a stabiliser.
I hate using hoops, for many reasons that I won’t bore you with. I prefer to use a papery stabiliser such as a stitch’n’tear, and I buy a roll at a time and use it for everything. There are lots of cheap unbranded ones out there – you could even use printer paper at a pinch. Papery stabilisers are rigid and inflexible (no puckering) without being thick or chunky. You could use a firm iron-on stabiliser, but I still prefer to use a paper-like stabiliser as well. Sometimes I bond it in place with a fusible, mostly I just place it underneath and the stitch holds it in place. Despite the name, I never tear it away, only the excess if it shows.
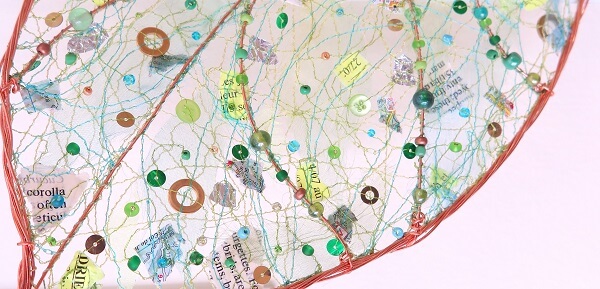
If you’ve taken any of my courses, you’ll know that my favourite combination of materials of all time is paper collage on a canvas base. Even that can distort with heavy stitching, but we’re talking gentle undulating waves, not lots of little wrinkles or puckering. I can live with that.
I think paper is my absolute favourite material fullstop.
Tissue paper is the only thing I haven’t really mastered. It will rip in a hoop but it’s not firm enough to stitch alone. The only answer seems to be bonding it to something else, or using a stabiliser – but then the characteristic translucency is lost. It’s a conundrum. One solution may be to try a wet-strength tissue with a water soluble stabiliser (also an option if you’re stitching something where both sides are visible). Watch this space, I might experiment!
Now I’ve mentioned them, the same rules apply to using water solubles: floppy will need a hoop, firm can be used without.
It’s all about the tension!
There has to be enough tension in the fabric to counteract the pull of the stitch and prevent puckering.
Friction
Rubber
Rubber and latex is sticky and squeaky and won’t glide nicely under the needle. If you really want to have a go at stitching on it (why?) use a stabiliser underneath to help it slide along the machine bed as you stitch. You may have problems with the needle sticking as it goes through, so you could always put stabiliser over the top as well (like a rubbery papery sandwich…) but I don’t think you’ll really be trying this one, will you?!
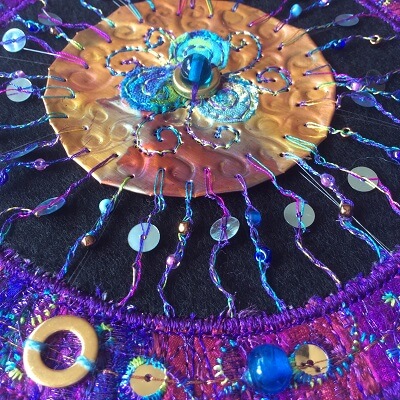
Thin metal and thin card
This is all about reducing friction. As the needle pierces the material, it creates a crown of raw metal points on the underneath. Not only can these scratch your machine bed, they also snag the thread causing it to break. The answer is simple: stabiliser! Pelmet Vilene or felt is wonderful with metals: it’s soft, and thick enough to absorb those sharp points. It also glides easily, for free motion. Felt can be on the floppy side, so depending on thickness, I may use a papery stabiliser too.
Card doesn’t create as sharp a crown as metal, but it’s still rough and will wear the thread as it passes through the holes created by the needle. One answer is to use bigger needle to make a bigger hole, but using a stabiliser will help. Reducing the tension on the top thread also helps, so it isn’t being pulled so tightly through the hole as the stitch is formed: a looser thread won’t rub as much. Paper tends to be softer, but there may still be a little friction – stabiliser stabiliser stabiliser!
Precision
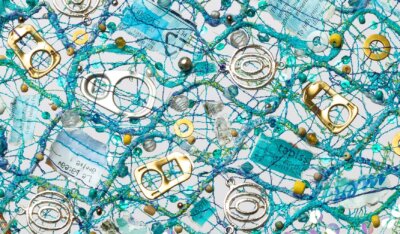
Want to stitch beads, sequins and assorted bits and bobs like ring pulls and washers? Want to satin stitch over a lampshade ring? Go for it, but you better get your eye in and be prepared to take your time.
Do NOT do this late at night, in dim light, or even attempt it if you don’t feel in control of your free motion embroidery yet. If you hit one of these things with a needle, you’ll know all about it.
Being able to stitch precisely, getting those stitches exactly where you want, is absolutely key for anything crunchy. A thinner machine needle also helps, so you can actually stitch through the whatever. I check each individual bead with an identical needle before I stitch, to make doubly sure. Taking the foot off altogether will stop you accidentally smashing any beads, but you’ll really have to watch your fingers then, so it’s not for the faint hearted or the beginner! If you do try it, don’t forget to lower the presser foot lever to engage the top tension: easily forgotten if the foot isn’t there as a visual prompt.
Nothing beats a steady hand on the fly wheel (take your foot off that pedal if you need to put your fingers anywhere near that needle!) and take your time. A good pair of glasses are pretty essential too, not least to protect your eyes in the unfortunate event of a broken needle or bead. Happens to the best of us.
Important: I am not advocating for stitching any of this stuff, nor am I taking any responsibility for you or your machine if you attempt any of it. That’s completely on you. I just know that if I mention it (as in this week’s podcast) someone is bound to ask me how to do it, so here you go! You try these things at your own risk.
Remember: tension, friction and precision.
7 Thoughts to “Strategies for stitching stuff”